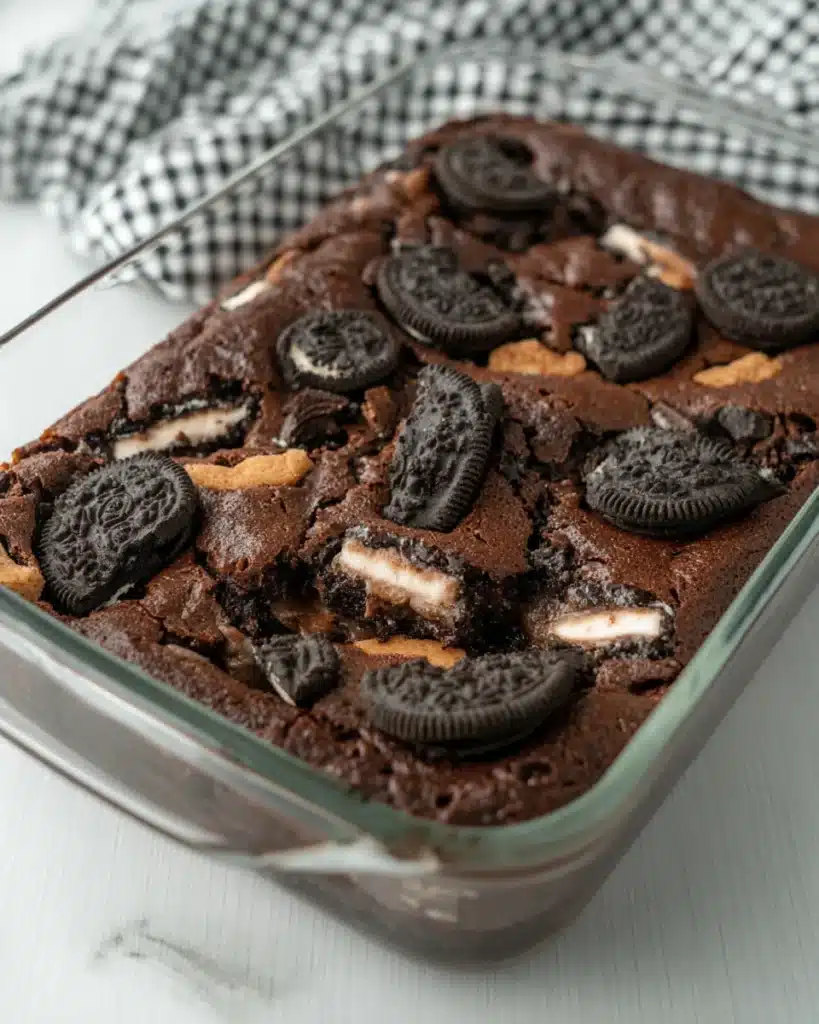
I still remember the first time I made this Oreo Cake. It was one of those nights when you want dessert but not the dishes. My sister was coming over, and I had a half-box of Oreos, Cool Whip in the fridge, and no energy to make anything fancy. This dump cake saved the night — warm, gooey, and ridiculously good.

Table of Contents
Why You’ll Love This Oreo Cake
Gooey layers with rich chocolate flavor
You get everything in one glorious bite: melty Oreos at the base, silky Cool Whip in the center, a rich layer of moist chocolate cake, and a golden, buttery crisp topping that melts right into it all. It’s the kind of Oreo cake that surprises you — gooey, soft, and a little crunchy at the edges. The sweetened condensed milk soaks through each layer, creating this molten, brownie-like texture that feels like a chocolate lava cake and a cookie trifle had a delicious dessert baby.
Every spoonful delivers that familiar cookies-and-cream flavor, but with more warmth and depth. It’s sweet, rich, and over-the-top in the best way. Serve it fresh from the oven or reheated the next day — either way, it holds onto its magic. This is more than a quick dessert; it’s an easy Oreo cake that comforts, impresses, and disappears fast from the pan.
No mixing bowls or complicated steps
Truly. No mixing required at all. You just layer everything into one dish and bake — that’s it. Making this Oreo cake feels more like assembling than cooking, which is why it’s so great for busy nights or those moments when you’re craving something sweet but don’t want to deal with a pile of dishes. Since there are no bowls or beaters to wash, you can clean up as you go, and by the time it’s out of the oven, your kitchen still looks tidy. That alone makes it a winner in my book.
This Oreo cake is perfect for when you want a warm, rich dessert without the extra effort. Whether it’s a last-minute treat for company or a cozy night in with a movie, this cake shows up big with very little work. And because it’s so easy, even kids can help layer the ingredients and feel like baking pros.
Perfect for parties, potlucks, and late-night cravings
This Oreo dump cake disappears fast. Everyone loves it — from kids to your dessert-snobby uncle. You can dress it up for a holiday or keep it casual for a Netflix snack. It’s a crowd-pleaser you’ll keep making again and again.
Ingredients You’ll Need
Just 5 pantry-friendly staples
You’ll only need five ingredients for the base:
- 20 Oreo cookies
- 1 can (14 oz) sweetened condensed milk
- 8 oz Cool Whip, thawed for 15 minutes
- 1 box chocolate cake mix
- ¾ cup butter (cut into 12 pats)
Optional toppings & mix-ins for variety
You can easily switch things up with mix-ins like peanut butter chips, crushed mint candy, or even mini marshmallows. Want it extra fancy? Try topping it with whipped cream and a sprinkle of crushed Oreos.
Step-by-Step: How to Make Oreo Dump Cake
Prep the pan and layer the Oreos
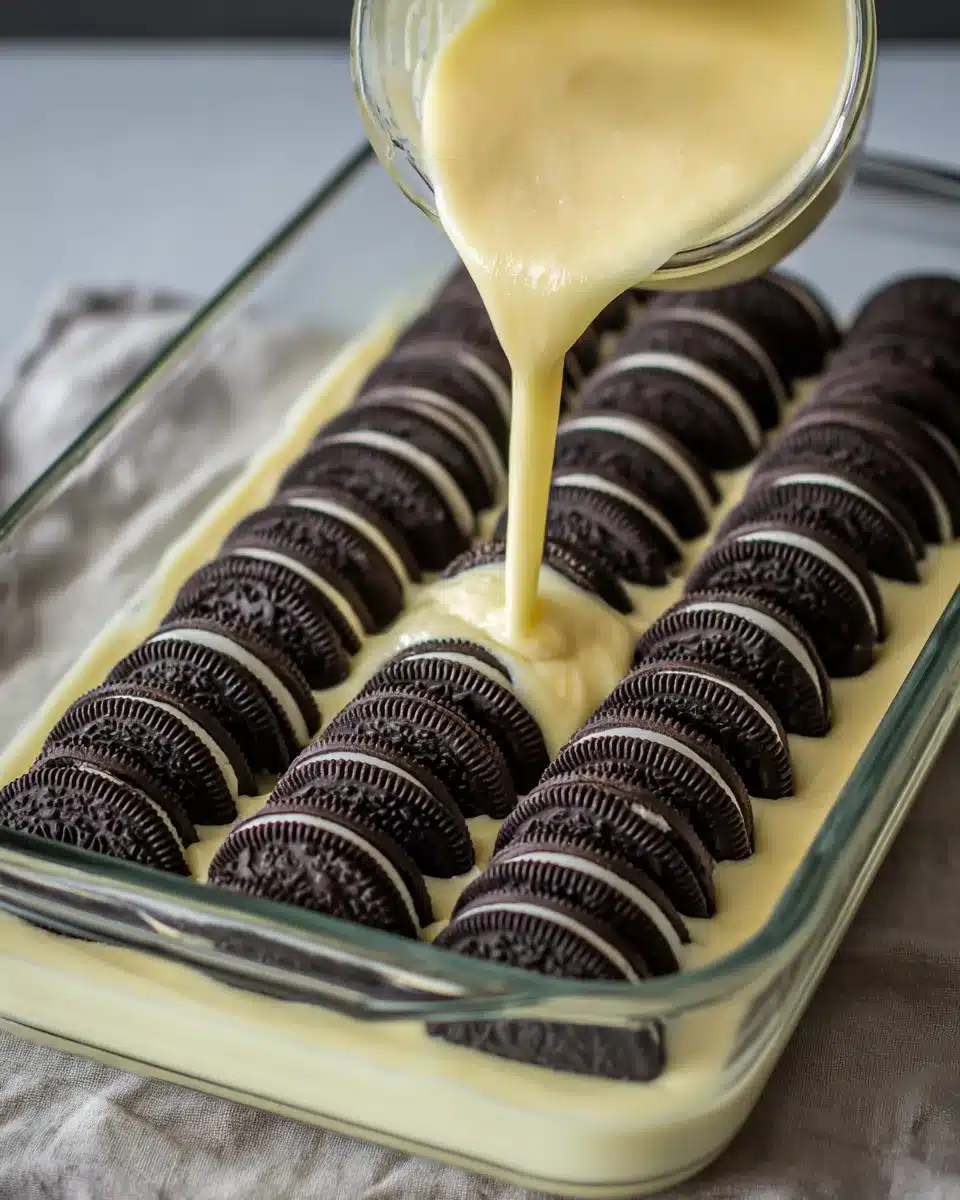
First, preheat your oven to 350°F. Lightly grease a 9×13 baking dish. Then, place 10 Oreo cookies on the bottom in two rows. They’ll soften while baking and form the fudgy base.
Add condensed milk and Cool Whip
Pour the sweetened condensed milk evenly over the Oreos. Next, gently spread the thawed Cool Whip on top. Try not to stir or swirl — the magic is in the layers.
Top with cake mix and butter
Sprinkle the dry chocolate cake mix over the Cool Whip layer. Use a fork to break up any big clumps. Then place the pats of butter across the top. Don’t mix anything in — trust the process.
Bake to gooey perfection
Bake the cake for 40–45 minutes, or until the top is crisp and bubbling at the edges. Let it cool slightly before digging in. The center should still be soft and melty — that’s the best part.

Expert Tips for Success
Don’t mix the layers
It might feel weird not to stir anything together, but that’s the key to the “dump cake” magic. Each ingredient melts into the next, creating dreamy textures.
Use quality ingredients for bold flavor
The better your Oreos and chocolate cake mix, the better the result. It’s worth using name-brand cookies or trying flavored Oreos like dark chocolate or golden.
Cool slightly before serving for clean scoops
Give the cake at least 10 minutes to settle once out of the oven. It’ll be easier to serve and won’t burn your tongue on the first bite — although we’ve all been there.
Delicious Ways to Serve It
Vanilla ice cream or whipped cream
A cold scoop of ice cream on top of warm Oreo cake is a total win. Or go for whipped cream and a few extra crushed Oreos for fun texture.
Chocolate sauce, berries, or crushed Oreos
Drizzle some chocolate sauce for an extra-rich finish. You can also add fresh strawberries or raspberries to balance out the sweetness.
How to Store & Reheat
Fridge-friendly for 3 days
Store leftovers in an airtight container in the fridge. It stays moist and tasty for up to 3 days, though chances are it won’t last that long.
Best reheated in the microwave
To reheat, just pop a portion into the microwave for 15–20 seconds. It gets soft and gooey again, like freshly baked.
Fun Variations to Try
Mint Oreo version
Use mint Oreos and a white cake mix for a cool, refreshing twist. Add a few chocolate chips for extra richness.
Peanut butter chocolate chip twist
Drop small spoonfuls of peanut butter between the Cool Whip and cake mix, and sprinkle in some chocolate chips. It turns into a peanut butter cup dream.
S’mores-inspired with marshmallows and graham crackers
Add mini marshmallows and crumbled graham crackers before baking for a campfire-style dessert. Bonus points if you use toasted marshmallow Oreos.
Oreo Dump Cake Recipe Card

Oreo Dump Cake (Easy 5-Ingredient Dessert)
Ingredients
- 20 Oreo cookies
- 14 oz 1 can sweetened condensed milk
- 8 oz Cool Whip thawed 15 minutes
- 1 box chocolate cake mix
- ¾ cup butter 1 ½ sticks or 12 tbsp, cut into pats
Instructions
- 1. Preheat oven to 350°F (175°C) and lightly grease a 9×13 baking dish.
- 2. Layer 10 Oreo cookies in two rows in the bottom of the pan.
- 3. Pour sweetened condensed milk evenly over the cookies.
- 4. Spread Cool Whip gently over the condensed milk.
- 5. Sprinkle the dry cake mix on top and break up any clumps.
- 6. Place pats of butter evenly across the cake mix surface. Do not mix.
- 7. Bake for 40–45 minutes until the top is bubbly and crisp around the edges. Cool slightly before serving.
Notes
Explore Similar Recipes
If you loved this, you’ll probably enjoy my indulgent chocolate cobbler dessert or this festive Halloween chocolate layer cake. For something chewy and playful, try the chewy brookies recipe (brownie-cookie mash-up). Or browse more classic Oreo dessert ideas for your next sweet fix.
FAQs About Oreo Dump Cake
How much time to bake Oreo cake?
You’ll want to bake it for 40 to 45 minutes at 350°F. The edges should bubble and the top should look slightly crisp.
How to make Oreos last longer?
Store them in an airtight container, ideally in a cool, dry spot. You can also freeze them for longer storage.
Does Oreo cake need to be refrigerated?
Yes, it’s best to keep leftovers in the fridge. It stays fresh for up to 3 days in a covered dish or container.
How long does Oreo cheesecake take to set?
Most no-bake Oreo cheesecakes take about 4–6 hours in the fridge, or overnight for best results.
To see more cozy treats and dessert ideas, follow along on Pinterest or check out what’s baking in my kitchen on Instagram.
